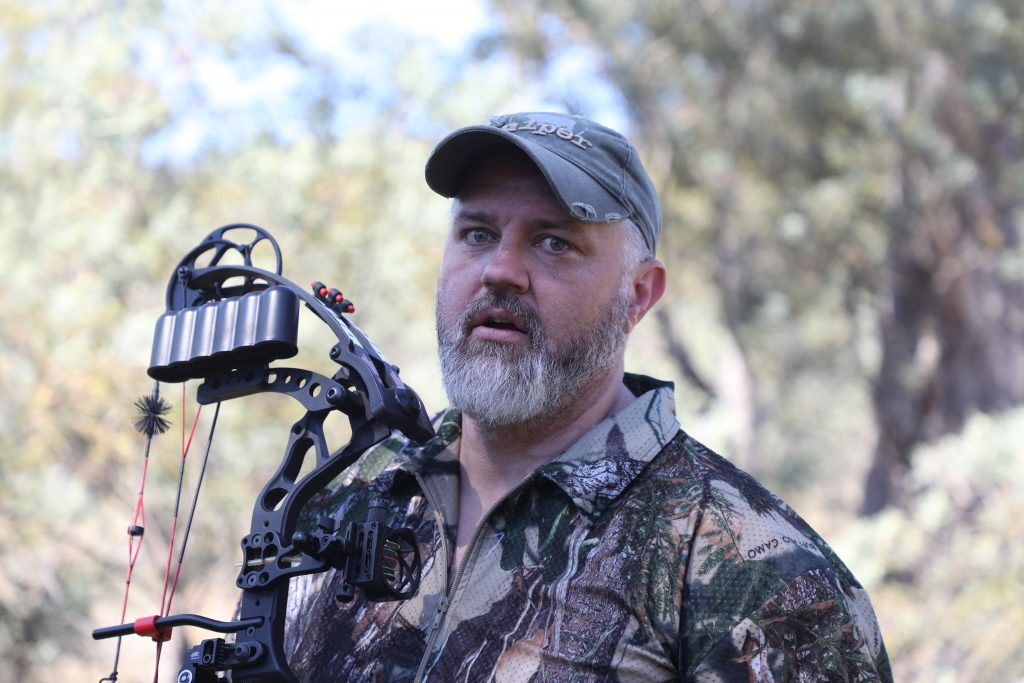
When you first learn how to bow hunt, choosing the right arrows can be very confusing. There are a lot of different factors to consider depending on whether your focus is on target archery or bow hunting. Hunting arrows and target arrows can be quite different so, for the purposes of this article, we will focus only on the hunting side. After all, we are I Am Hunter!
But, even with that, the choice often comes down to the preferences of the archer themselves.
Just so you know… this won’t be a short article, as properly understanding your arrows isn’t a simple process and unfortunately sometimes the information isn’t always cut and dry.
So let’s start with the basics.
Table of Contents
Parts of an arrow
- Shaft
The shaft is the length of the arrow, which can be made of a few different materials. Each material can be used for a different purpose and will behave differently. - Arrow Head
This is the point at the end of the shaft that penetrates into the target or animal first. It usually screws on to the front of the shaft. Each different point or arrow head will have a different use (we will discuss this further on in the article). - The Fletching
Located at the back end of the arrow, fletching consists of three (sometimes four) pieces called vanes. These can be made of plastic or feathers. Often two of the vanes will be the same colour and the third will be a different colour to indicate it being the index vane. - The Nock
Right at the end of the shaft, the nock is a slotted bit of plastic that inserts inside the back of the shaft. The bow string will fit into the slotted bit at the ‘nocking point’ on your bow string and hold the arrow in place.
Most Common Arrow Heads and their uses
- Bullet Points
As the name suggests, this point is shaped like a bullet and is most commonly used for target practice. The curved sides of the point make it easier to remove from targets. - Field Tips
One of the most commonly used target arrows, they are sharper than the bullet points and curve inwards toward the middle of the arrow. In addition to target practice, field tips can also be used for smaller game like rabbits and birds. - Blunt Tips
Usually cylindrical with a flat tip, blunt tips use blunt force to take down small game as opposed to penetration. - Fish Points
As the name implies, fish points are often used for bow fishing. The barbed point, which is sometimes spring loaded, secures the fish until you can land it or bring it onto the boat. - Judo Points
These arrow heads have a blunt or flat tip, which grabs onto anything they hit and will stick straight up. They are known as the ‘unloseable miracle point’ and often used on small game. - Broadheads
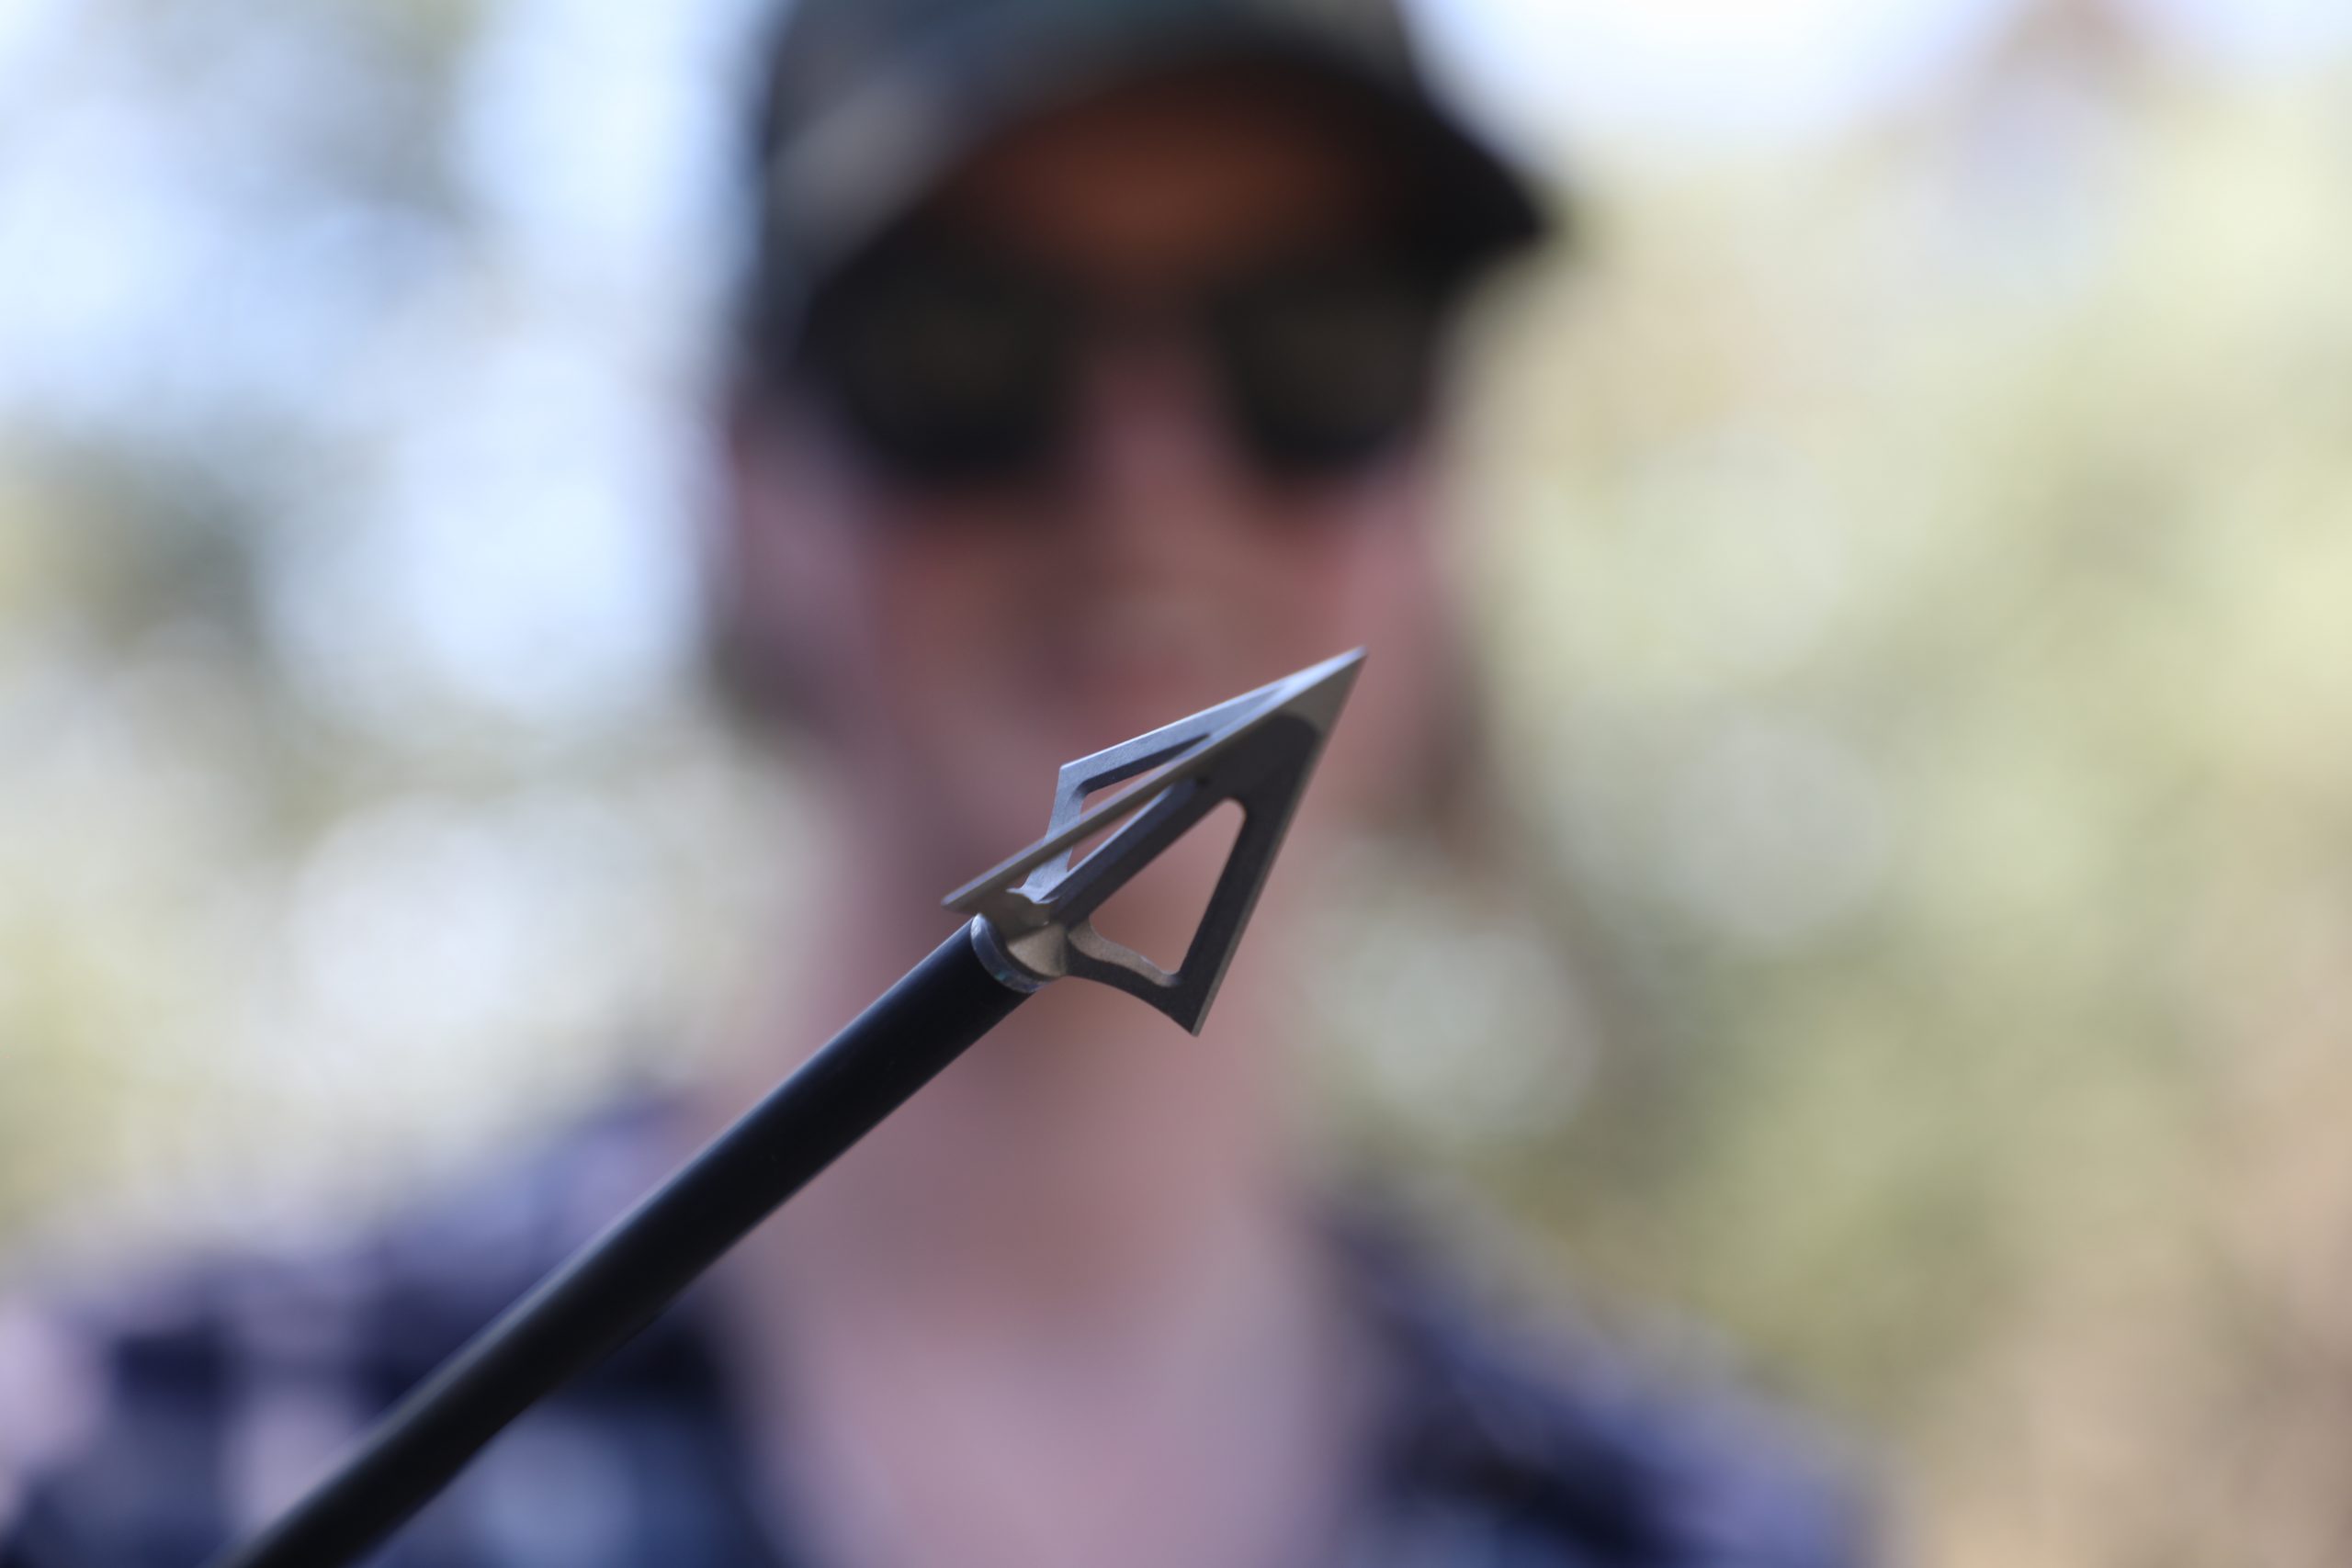
If you intend to hunt bigger game animals, you are going to need broadheads. They are very sharp – like a razor blade – and lined with blades. There are a few different types of broadheads you can get.
– Fixed blade – this is the oldest type of broadhead. The sharp blades don’t move and cannot be replaced though some can be sharpened.
– Removable blades – similar to fixed blade but the blades can be replaced if damaged.
– Mechanical – this is a newer style of broadhead. Before shooting, the tip will look similar to a field tip with the blades folded down but, upon hitting an animal, the blades spring open, creating a large, cutting surface area. There is some speculation on whether these fly more accurately because they are more like a field tip with less wind resistance.
– Hybrid tip – This is a mixture of fixed and mechanical blades. It will have a fixed blade at the front and a mechanical blade folded behind this. Like the normal mechanical it will open up upon hitting the animal.
Some other things to consider with arrow heads is chisel tip vs cut-on-contact tip. Chisel tips are used to break bones, and are best for shoulder shots. The blades sit behind the tip and the tip will clear the path for the blade to then cut through the organs. Cut-on-contact tips are incredibly sharp and the blade will start from the tip flaring out backwards. These are best for animals with a thick hide.
Factors to consider when selecting arrows
Now that you know the parts of your arrow, you need to know more about the features of your arrow. It can be a bit confusing but we will break them down as best we can.
- Length
Arrow length is determined by your draw length as your arrow needs to be longer than your draw length (Read our article on starting out bow hunting to find out how to measure your draw length). If your arrow length is too short, the arrow can fall off the arrow rest and shoot you in the hand. If your arrow length is too long, it can fly awkwardly. A good guide is 1-2 inches longer than your draw.When you purchase arrow shafts online, they will sometimes be much longer than you need them to be. This allows you to cut the shaft down to size. You can do this yourself or at an archery shop.
- Spine
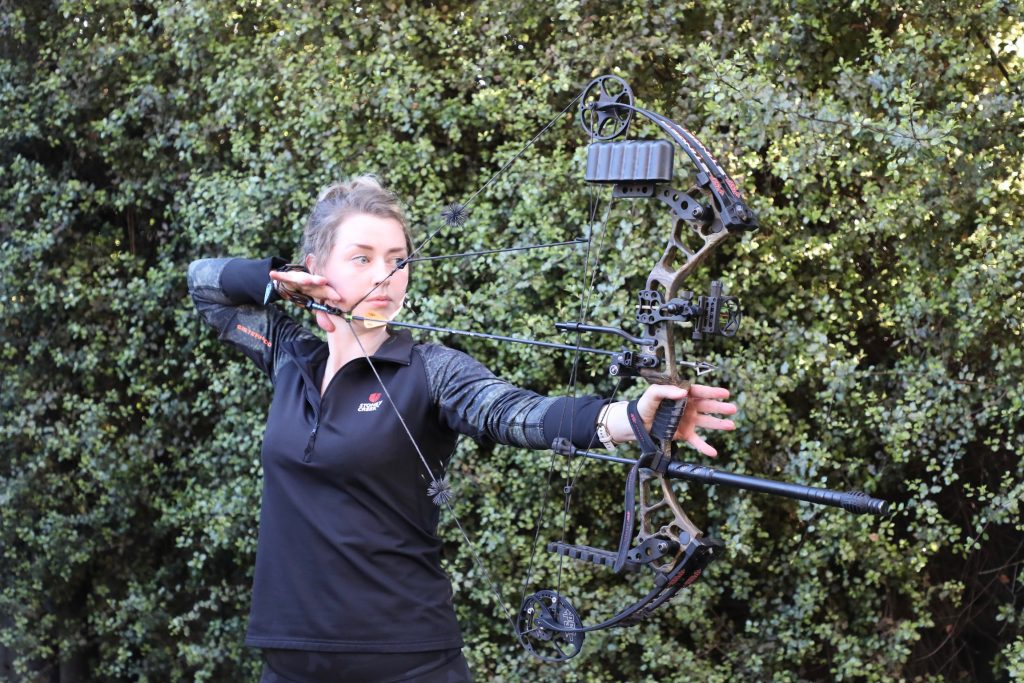
The spine of an arrow is pretty much its bendability. Whether you are shooting a compound bow or a traditional bow (go you – that’s pretty hardcore), it really pays to know what the spine does and how it can affect your bow hunting. Like many things to do with bow hunting, the explanation on how to choose your spine is quite in-depth.
There’s something called ‘The Archer’s Paradox’ that applies to archery. It’s a pretty weird concept and a little difficult to explain but in theory, when you are shooting an arrow and wanting it to hit the centre of the target, you need to aim the bowstring at the centre of the target… right? With me so far? But what happens then is that the arrow shaft is now slightly off centre. (This applies mostly for trad bows, as compound bows usually have a bend in the riser that lets the arrow sit almost perfectly straight).When the bow string is pulled back the arrow straightens up slightly but is still off centre. The paradox takes place at the angle between the bow limb and the arrow. But how does a misaligned arrow shoot straight? And hit your target without you compensating? Here’s a video that can explain it better than I can.
Okay so back to the spine. Arrows bend. This is normal. It’s also an important factor in choosing your arrows. Different arrows will be manufactured with different amounts of spine.
If the arrow doesn’t have enough spine, it is referred to as weak and will bend too much before it gets to the target. This not only makes it unpredictable; it also makes it dangerous. If the arrow has too much spine, it is referred to as stiff and will fly sideways to the target. Which is no good for accuracy!
Theoretically, an arrow that is too stiff will favour the left and too weak will favour the right. It is better to have an arrow that is a bit too stiff than too weak.
So what has an affect on spine and what makes an arrow bend?
– Draw Weight – the higher the draw weight, the stiffer the arrow you will need.
– Length of arrow – the longer the arrow, the stiffer the arrow needs to be. Think of a walking stick. At about a metre long, a walking stick is quite stiff. Now make that walking stick 20 metres and try to hold it up. The walking stick is going to bend.
– Weight of arrow tip – the weight at the end of the arrow will definitely affect the way it bends. The heavier the tip on the end, the stiffer your arrow will need to be.
– Arrow material – the kind of material an arrow is made of plays a part in how much it will bend.
– For compound bows – If you have aggressive cams on your compound bow you will need to use stiffer arrows as they will put more force on the arrow.
Things you should know about spine:
– All of your arrows need to have the same spine. Because spine affects the trajectory of an arrow, you will need to make sure the arrows you are shooting all have the same spine to ensure a good grouping.
– Arrows vary. I know I said they all need to have the same spine and that’s true but there still will be some variation. Companies have tried their best to make each arrow as close as possible to each other but variation is inevitable. Generally speaking, the more expensive the arrow, the less variation you will have from arrow to arrow.
– An arrows spine will wear over time. If you’ve shot an arrow a few hundred times you can expect some loss of integrity. For this reason, you should replace your arrows every few months if you are shooting a lot.
- Diameter
Target archers will usually get a thicker diameter of arrow as they have a higher chance of hitting lines for a higher score.Hunters will often opt for a thinner arrow, as the wind is less of a factor on a thin arrow. This is because there is less surface area for the wind to hit. Thinner arrows are also more effective for penetration on animals.
- Straightness
It’s best for your arrows to be as straight as possible. Manufacturers will give you something called ‘straightness tolerance’. For example an arrow with a straightness tolerance of +/- 0.001 of an inch will be straighter than an arrow with +/- 0.004 of an inch. As with spine, the more expensive the arrow, the less variance you will get and the straighter the arrow.Most people will be more concerned with the spine of the arrow than the straightness. Arrows nowadays are pretty straight and modern carbon arrows usually only have a variance of between 0.001-0.006 inches, which really isn’t much difference at all.
- Weight
The weight of your arrow will be determined by a few different things and is measured in grains or grains per inch (GPI).Factors:
– The diameter of the arrow
– The thickness of the walls of the arrow
– Material the arrow is made ofThe weight of the arrow will directly correlate with the poundage of your bow. Light bow = lighter arrow. Heavy bow = heavier arrow.
Hunters usually prefer a heavier arrow because heavier arrows retain their kinetic energy better. “Kinetic energy is the energy an object has while in motion”. The more kinetic energy an object has the more likely it is to penetrate further into the target/animal.
In saying this, you do need to take into consideration that heavier arrows also travel at slower speeds. You need to find the balance between the speed and the kinetic energy.
- Tip
The weight of the tip is something you also need to factor in. This will depend on how you want the arrow to behave. The lighter the bow poundage, the lighter the tip should be so it doesn’t weigh down the arrow. BUT, hunters usually prefer a heavier tip and generally speaking, the bigger the animal, the heavier the tip you will want and the higher the poundage of your bow.w
Arrow Materials
Arrows are usually made from one of four different materials. There are pros and cons to all of these but it’s ultimately up to the archer to decide the material they want to shoot with. The majority of the time, hunters will choose a carbon or aluminium/carbon mix. Each material has a different purpose and will react differently when shot.
- Wood
The OG. Cost effective but don’t last long. Okay for beginners to use for target practice when getting used to their bow. A lot of variation arrow to arrow. Not often used in competition archery but some traditional hunters and long bow shooters will use them. Another benefit is you can actually make them yourself. If this interests you, there are loads of videos on how to make your own arrows. - Aluminium
These are a little bit more costly than wood but pretty versatile. Aluminium can be used for target or hunting. They are a little stronger than carbon arrows and great for shooting at targets when you have tight groupings as they are less likely to break if they hit each other. - Carbon
Stiff arrows and great for heavier bows but can be a little pricey. Often used with compound bows for hunting. Carbon arrows can be made very thin for better penetration. However, they are prone to splinter. If your arrow splinters, dispose of it as soon as possible, a splintered or damaged arrow can be very dangerous. (Look up splintered carbon arrow on Google at your own risk… It’s not pretty, but injuries from a splintered arrow can be very serious!) - Aluminium/Carbon mix
This kind of arrow has an aluminium centre with a carbon outer. It has the same benefits as a carbon arrow: light, stiff, and performs well in wind but combine some of the benefits of carbon arrows too. They are good to use with longer distance shots and popular with competition archery. But be warned: they can get quite expensive.
Below is a video of what happens when you shoot a splintered or broken arrow.
WARNING: Do not watch if you are squeamish.
Measurements for different arrow materials
- Wood
Wooden arrows use a pretty easy 4-digit measurement system. For example, if you are buying an arrow with 4050 next to it, this means the arrow is made for a bow that is between 40 and 50 pounds. See? Pretty easy. But what this doesn’t tell you is anything else about the arrow. Like the type of wood used or the spine. But wooden arrows are used more for leisure so this isn’t as important. - Aluminium
Aluminium arrows also use a 4 digit number. However, this number has nothing to do with your bow poundage. The first two digits are the actual diameter of the arrow in 64ths of an inch. The last two are the thickness of the walls of the arrow measured in 1000ths of an inch. For example, if you’re buying an arrow that says 1916 this would mean that the arrows diameter is 19/64ths of an inch and the walls of the arrow are 16/1000ths of an inch thick. Not as simple but not too hard. - Carbon
This is where it gets tricky. Different manufacturers can sometimes use different measurements. The most common measurement is a 3 digit number. This measures the amount of bend an arrow with a 28 inch spine will have when 2 pounds of pressure is applied to it’s mid-point. For example, #400 bends at 0.400 inches. The lower the number, the stronger the arrow is and the more suited it is for a heavy draw weight. However, some manufacturers will use measurements closer to that of the wooden arrow, just to make things confusing!
Choosing arrow size
All you need:
– Type of bow you are using
– Your draw weight
– Length of arrow you need
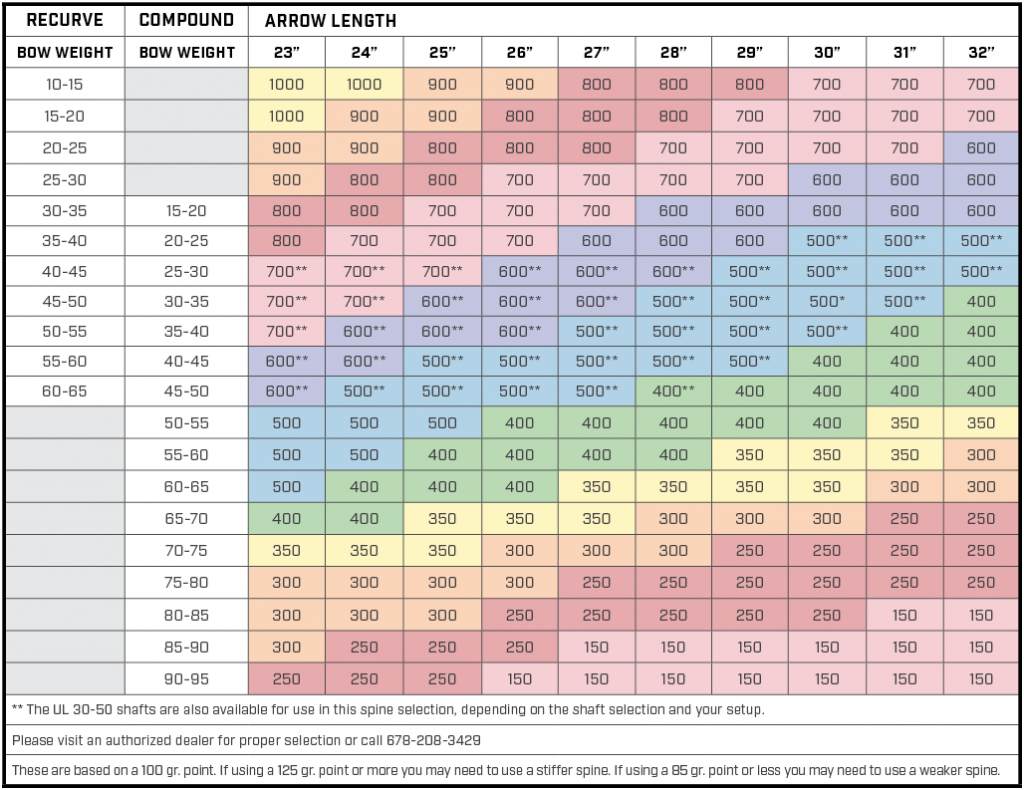
Arrow manufacturers will usually have ‘arrow charts’ on their website. These can sometimes be a little difficult to read.
I would recommend going to an archery store or pro shop and have them fit you for arrows (yes, this is a thing).
Here’s an example of an arrow chart from Black Eagle Arrows.
Guide to buying arrows
- Start cheap – when you’re starting out, it’s easy to damage arrows so starting with cheaper ones will save you some money up front.
- Arrow vanes that aren’t straight isn’t necessarily a bad thing. People do this on purpose, this is called a helical configuration. This helps the arrow spin and stabilises it while it flies.
- Arrows sometimes come ‘Shaft only’, meaning you then have to add vanes, a point and a nock. Once you get more confident and start experimenting with different parts of the arrow buying shaft only is the easier way. But as a beginner I’d stick with pre-made as they are a little cheaper.
- Vanes can come as feathers or plastic. But the majority of the time for hunting, you will see plastic vanes. This is because once feather vanes get wet, they will weigh down the arrow.
- Larger, heavier arrows usually require larger vanes to stabilize the arrow while it flies.
- If you are using a high poundage bow or a compound bow, generally speaking you will need a stiffer arrow as your draw weight increases. Also as the length of your arrow increases the stiffness will need to increase.
- Watch the wind! The wind is going to have an affect on every arrow but will affect larger diameter arrows more than smaller ones.
Choosing arrows may seem daunting and confusing – there are so many on the market and EVERY business seems to think they have the perfect arrow for you but in reality it’s mostly about preference, the animal you are hunting, your draw length and weight.
Conclusion
See, as I mentioned earlier, choosing arrows isn’t exactly straight forward and can be really daunting at first, but as you get more confident and get to know your bow and shooting style better you will start to understand the process better.
Just remember: everyone is different. The arrow you need will be different from somebody else’s, as will be your preferences. However, a little trial and error will help you find what works best for you.
What is I Am Hunter?
I Am Hunter wants to change the way hunting is perceived and to change the conversation from a negative one driven by anti-hunters to a positive one led by hunters.
Our goal is to help hunters become positive role models and ambassadors for hunting, while simultaneously helping non-hunters understand why hunting is important.
You can become a supporter and help us achieve our goal and spread a positive message about hunting with the wider community.
Related content
If you would like to know more about hunting wallabies, kangaroos or deer in Tasmania, check out these related articles and podcasts.
Our other channels
Get our newsletter
Get our free monthly newsletter direct to your inbox
Listen on iTunes
Listen to our podcast on iTunes.
TV series
Watch I Am Hunter episodes on My Outdoor TV (MOTV)